SD Card Boot
This is the default setup as shipped from the factory. If using a Reach Technology DevKit, you will not need to flash an SD card unless Reach Technology provides you with a URL for an updated image.
Important
Be sure to use a good quality SD card that is 8GB or larger.
Tip
The various SD card images are available for download here…
Processor |
Download Links Table |
|---|---|
i.MX6DL |
|
STM32MP1571 |
|
STM32MP1572 |
Once you’ve downloaded the compressed image from the website, follow these steps3 to flash the SD card for the G3 module:
1# to generate the hash of the downloaded file to compare to the value on the website
2> md5sum <image-file-name.bz>
3
4# to decompress the image file
5> bunzip2 <image-file-name.bz>
6
7# to flash the image on the SD card
8> dd if=<image-file-name.sdimg> of=<sd-card-dev> bs=4M conv=fdatasync status=progress
Footnotes:
- 1
Images for boards with no TPM.
- 2
Images for boards with a TPM.
- 3
These steps assume you are using a Linux host, e.g. Ubuntu or Linux Mint 20 XFCE, to flash the SD card. You’ll need an appropriate application to flash the card if using a Windows host computer.
Warning
Pay close attention when typing in the value of <sd-card-dev>.
This is the root device special file for your SD card writer; e.g. /dev/sdh,
note there should be no partition number.
If you accidentally enter the device special file for your host hard drive, you’ll destroy the host O/S and have to reinstall it!!!
Once you have a flashed SD card, insert it into the holder on the G3 module, make sure
the boot jumper block has no jumpers installed and power up the board. Assuming
you have the debug interface cable hooked up and are connected via a terminal
application such as picocom (on Linux) or TeraTerm (on Windows), you
should be able to watch the G3 module boot.
Alternative - Flashing an SD card on Windows 10
We do not recommend this approach as it is quite easy to get it wrong4 on Windows 10.
Nevertheless, here are the steps to follow to burn an embedded image file to an
SD card on Windows 10. These steps require two Windows utility programs to be downloaded
and installed on your Windows 10 system:
Once the required utilities are installed, proceed as follows:
In Windows Explorer, select the tarball containing the G3 module release as shown in the figure below:
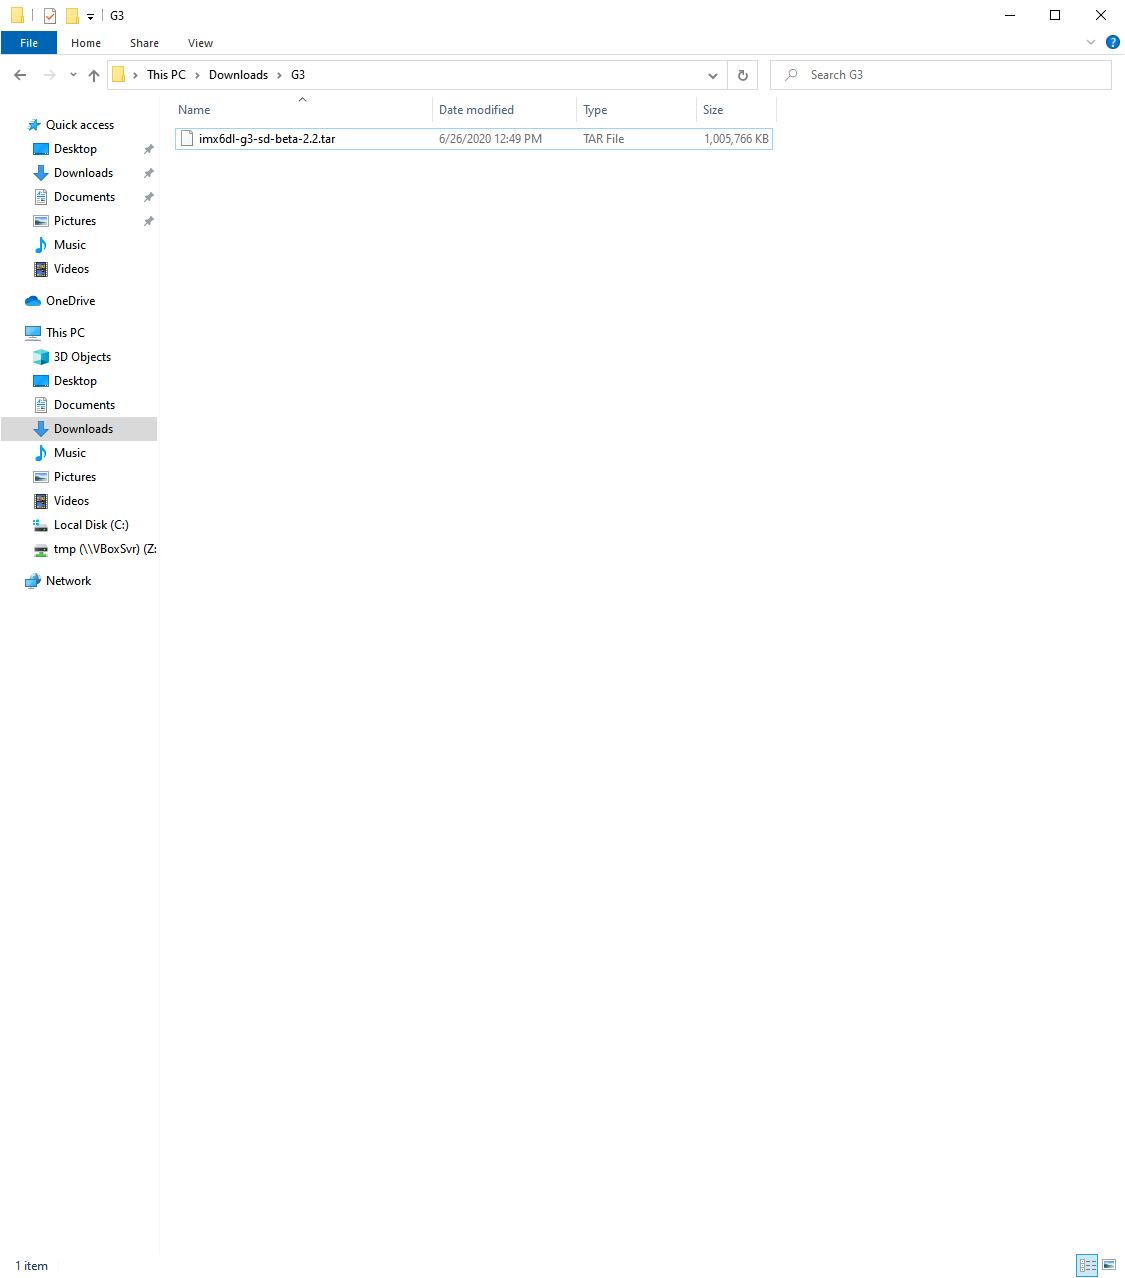
Selecting the G3 Module Release Tarball
Right-click on the tarball file, then select “Extract Here” under the “7-Zip” section of the context menu as in the figure below:
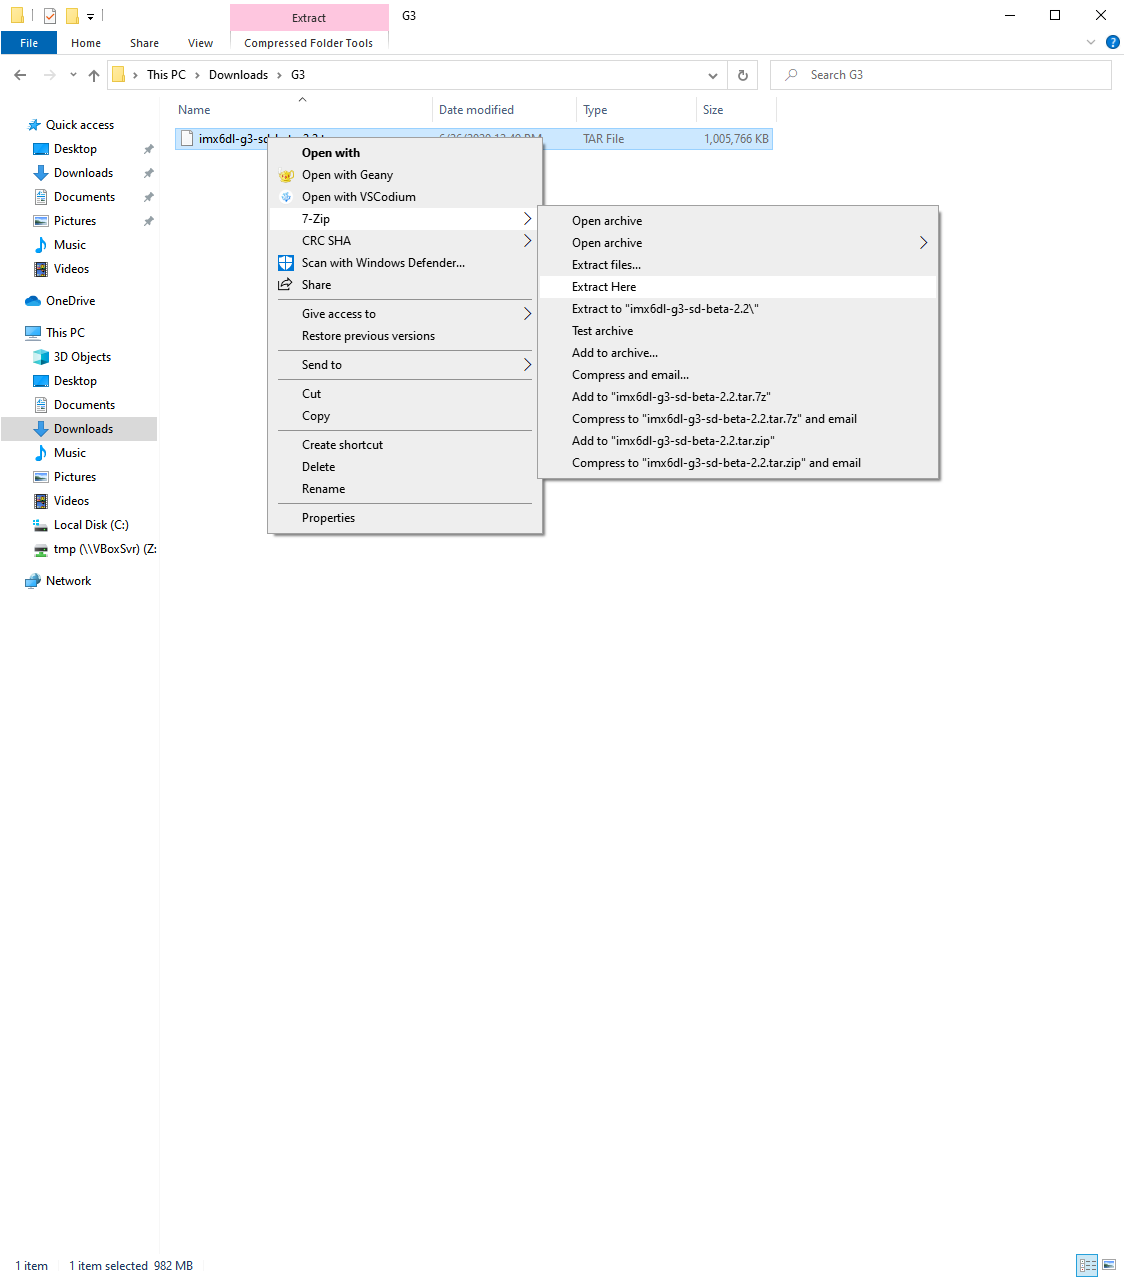
Extracting the G3 Module Release Tarball
This step will extract four files from the tarball, including the bzip2 compressed embedded image.
Select the compressed image, as shown in the figure below:
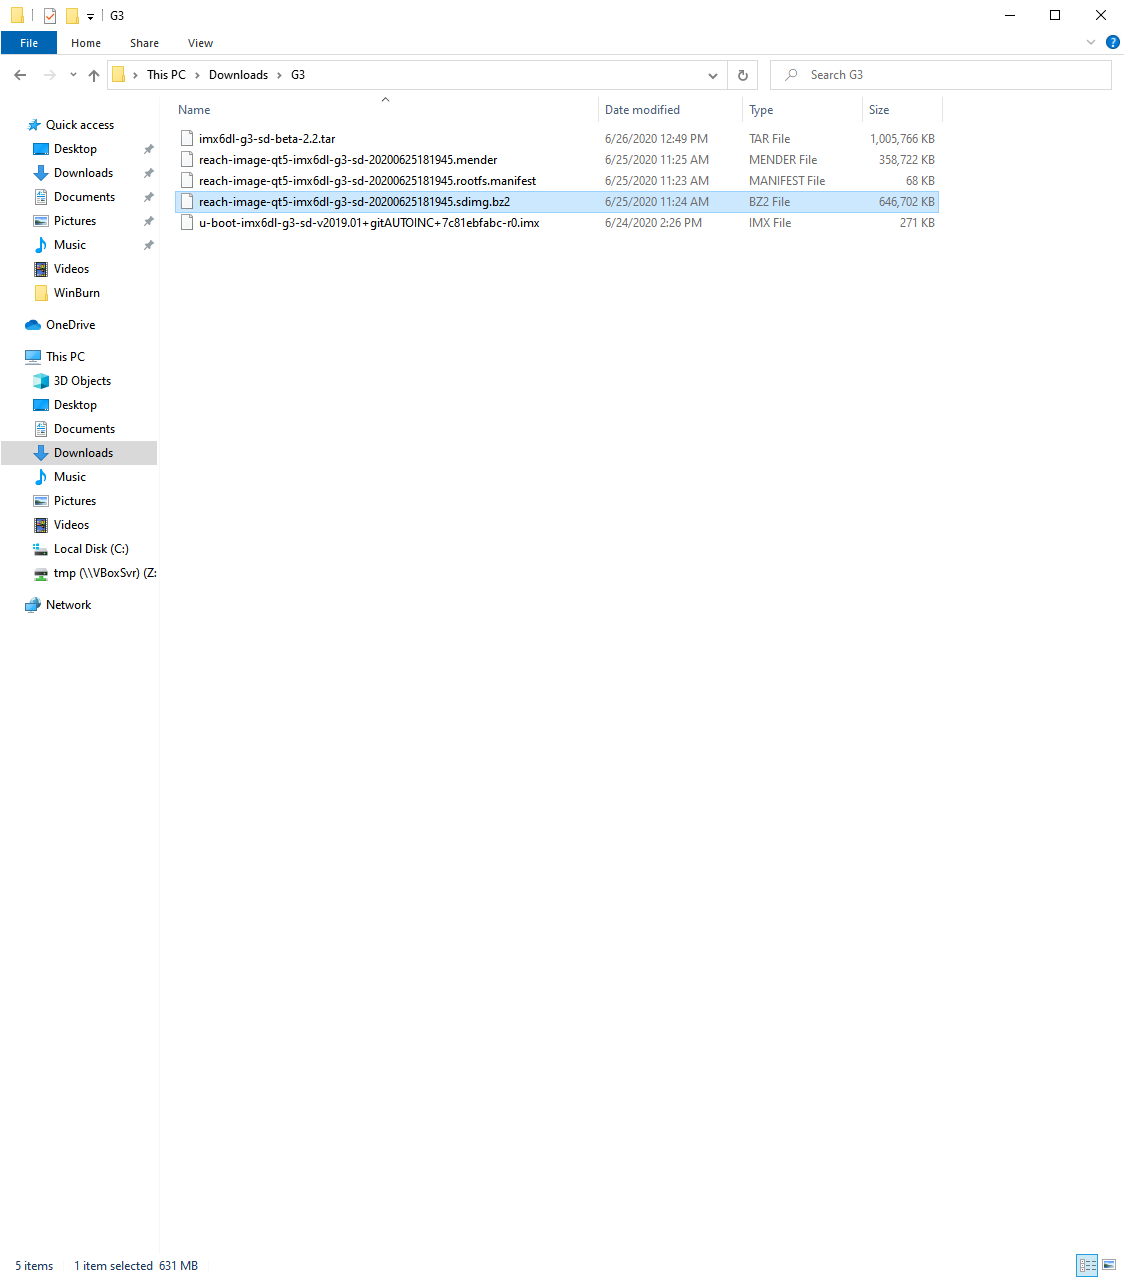
Selecting the G3 Module Compressed Image
Right-click on the bz2 file, then select “Extract Here” under the “7-Zip” section of the context menu as in the figure below:
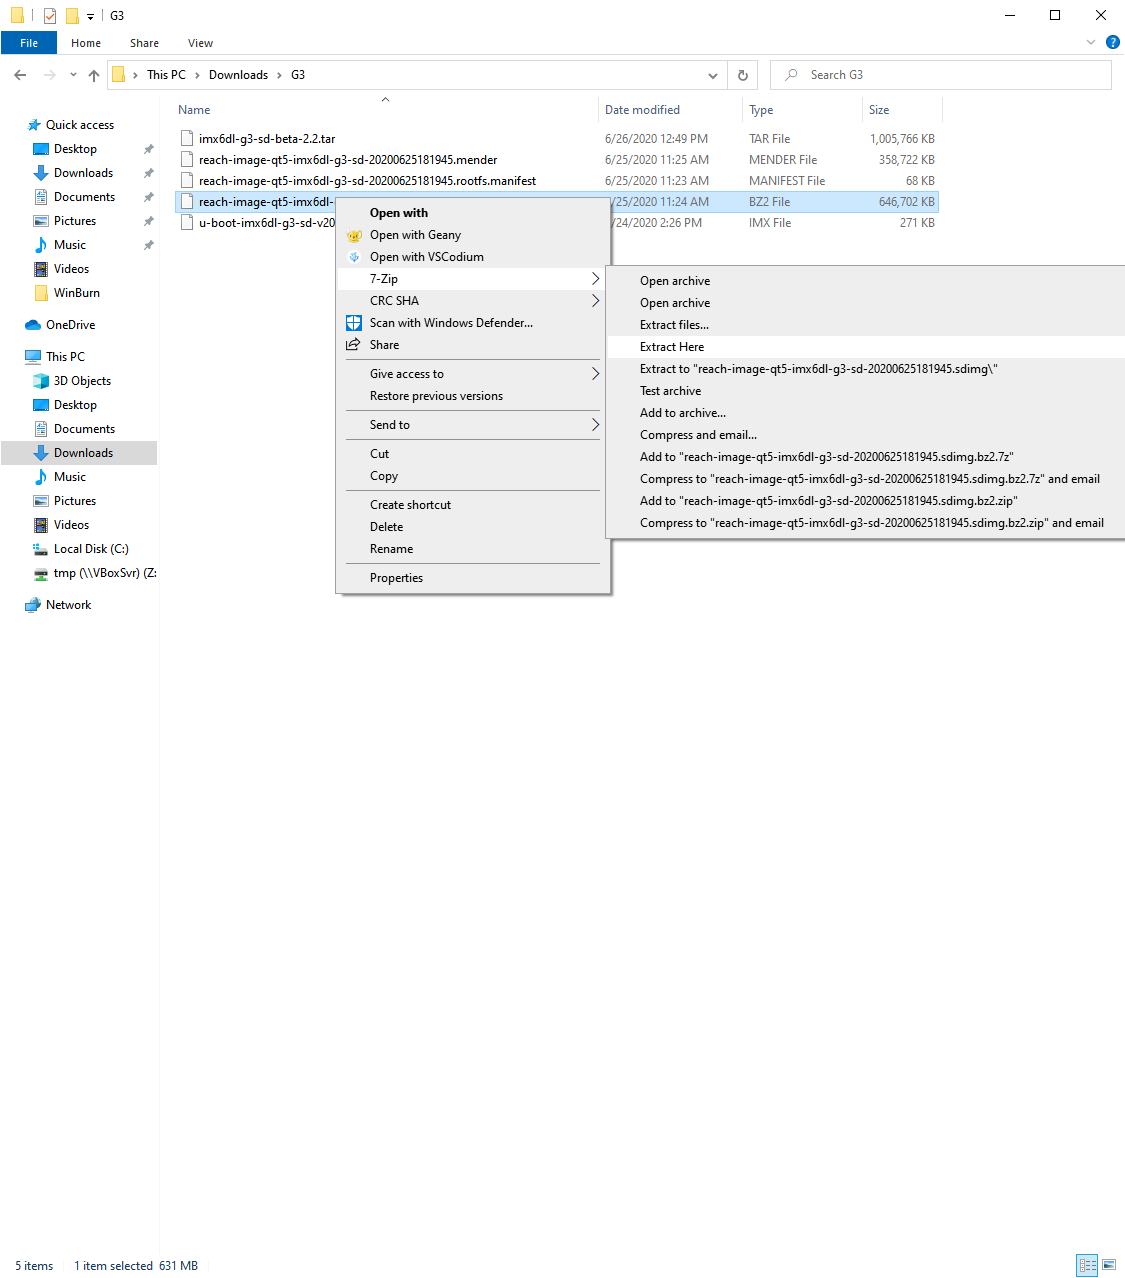
Decompressing the G3 Module Compressed Image
This will result in the addition of a new (much larger) file to the directory with the same name as the compressed image file, minus the “.bz2” extension.
Insert an SD card into your reader/writer.
Warning
Testing has shown that inserting an SD card with multiple partitions on
it after launching win32 disk imager will cause it to potentially not list the correct
Windows 10 drive letter that represents the whole SD card.
Launch the win32 disk imager application which will bring up a window like the one in the figure below:
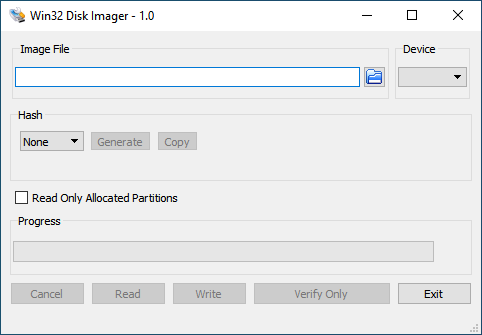
Starting the Win32 Disk Imager
Click the blue folder button in the “Image File” group box to bring up the image file selection dialog. Change the filter at the lower right corner to “*.*” so the “.sdimg” file will be listed. Select the “.sdimg” file as in the figure below:
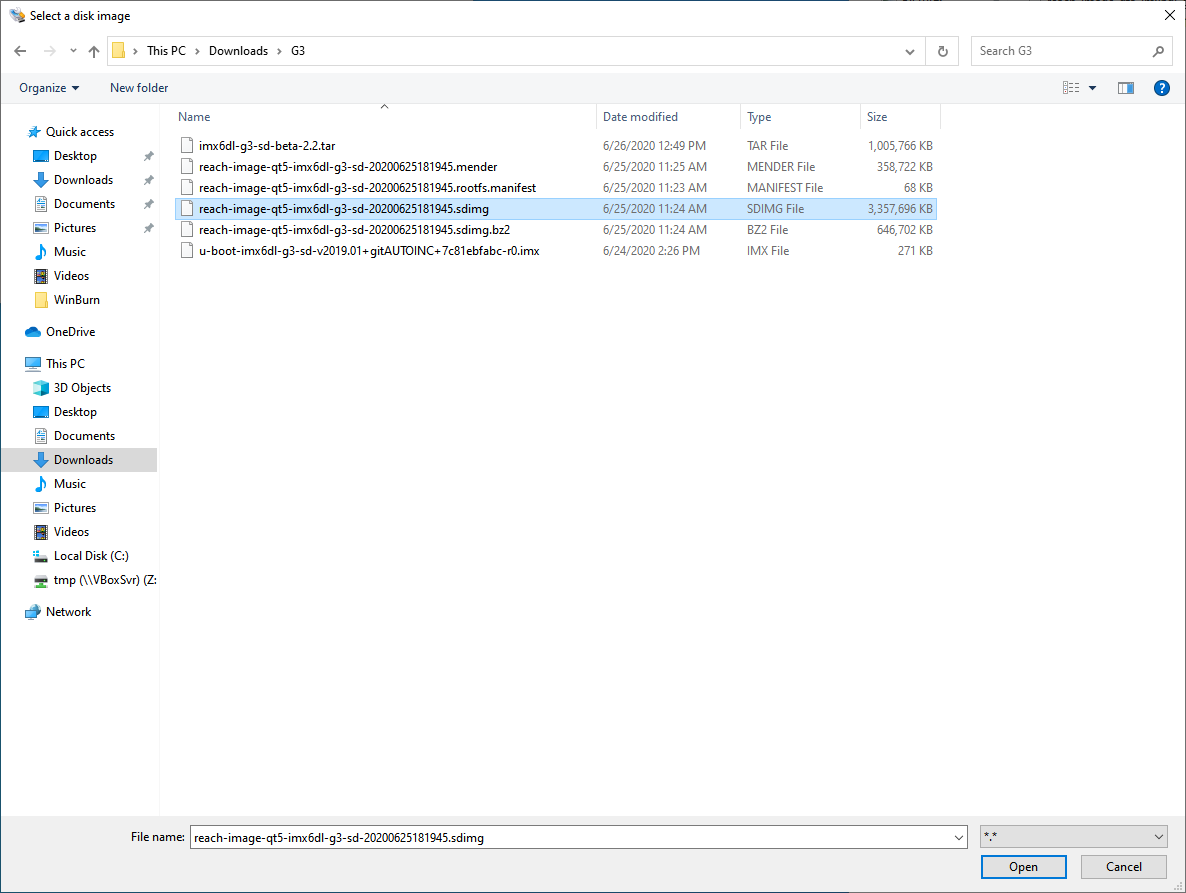
Selecting the G3 Module Image
At this point, unless you’ve inserted more than just a single SD card, you likely have
one available choice in the “Device” group box pull-down list. If there is more than one,
exercise extreme care to ensure you select the Windows 10 drive letter that represents the
entire SD card.
Select the appropriate target device as in the figure below:
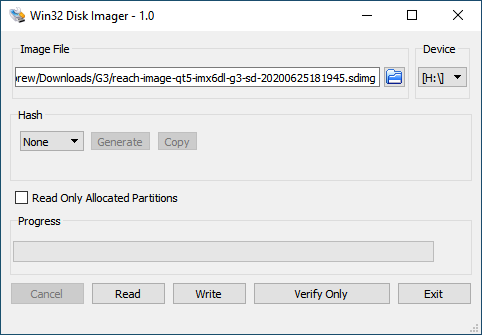
Selecting the Target Device
Warning
If using a new SD card, you will probably only see a single
option in the pull-down list. However, if the SD card has multiple partitions
with filesystems that Windows 10 can read, there will be multiple options because
Windows 10 will automatically mount those filesystems and assign drive letters.
Be very careful to select the option that represents the entire SD card.
Tip
When in doubt just replace any existing partition table on the SD card with
an empty DOS partition table. On Linux, this is easily achieved with the “o”
command in fdisk. On Windows 10 you can do it with Disk Management
found at “Control Panel”->”Administrative Tools”->”Computer Management”->”Disk Management”.
When you insert an SD card with a empty partition table, Windows 10 will whine, whimper,
moan and complain it needs to format the disk before it can be
used. Just ignore that hogwash and dismiss the dialog box and launch win32 disk imager to burn it.
(If you try the format, it will fail anyway because the partition table is empty and
Windows 10 isn’t smart enough just to use the whole thing.)
Click the “Write” button, which will pop up the confirmation dialog below:
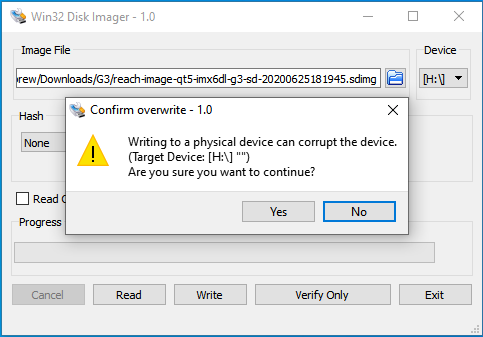
Confirm the SD Card Flash Parameters
If all is peachy keen, click “Yes” to start the flashing process. The progress bar will update to show the status of the burn:
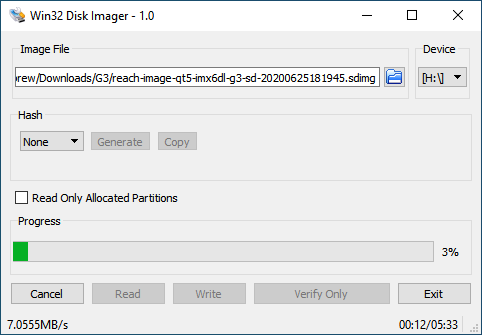
SD Card Flashing in Progress
When the image burn is complete, you’ll get the “Write Successful” dialog:
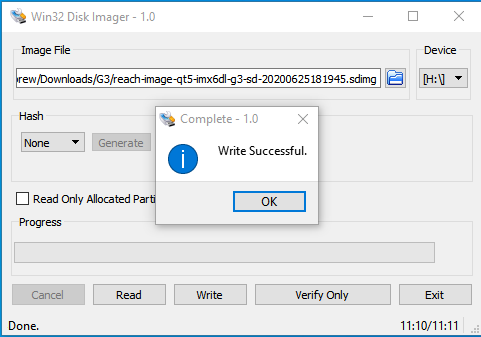
SD Card Flashing Complete
Footnotes:
- 4
The most common error on
Windows 10is to select the wrong target device. This often occurs when the SD card has multiple partitions with filesystems readable byWindows 10.