Windows 10 Desktop Configuration (VirtualBox)
Important
Before diving into the required VM settings changes, let’s take a few moments to discuss the realities of connecting a device like the G3 module to a typical corporate network.
Of course, most people are concerned about security when connecting any device to their network. Many IT departments simply forbid connecting any device they do not directly control. Smaller organizations may take this approach to keep network management simple from a security point of view. There are two options for dealing with this situation:
Add a second network interface to the host PC (a USB dongle will work just fine), or
Remove the PC from the main network and setup an isolated network (i.e. air-gapped from the main corporate net) for the end product application development.
No matter which option you choose, the development host and the G3 module must have (effectively) static IP addresses. This allows communications for on-target debugging and migrating applications and associated date between the host and the G3 module without reconfiguration each time.
This can be achieved a couple of ways:
Assign the IP addresses manually.
Configure a DHCP server to use host reservations for the development host and the G3 module. This is equivalent to manually setting static IP addresses.
Reach Technology G3 Developer VM Settings
You may wish to adjust some of the virtual machine settings to take better advantage of your development host hardware.
Tip
Remember that VM settings can only be tweaked while the VM is stopped.
Prior to making any of these changes, you should complete these physical connections:
Debug interface port
Ethernet port (J3)
“Y” power/RS-232 cable (J2), but do not power up the G3 module yet
Settings You Must Change
These configuration items must be changed or the Reach Technology G3 Developer VM will not be able to communicate with and control the G3 module target device.
Serial Port Configuration
When you plug the USB connector of the debug interface cable into your Windows 10 host,
Windows will setup a new COM port for it. The first time you do this, you may have to
use the Device Manager to install the required driver. Use the default of searching the
net for the driver, and it will pull the required one directly from Microsoft. When the
driver is installed correctly, your Device Manager should look something like this:
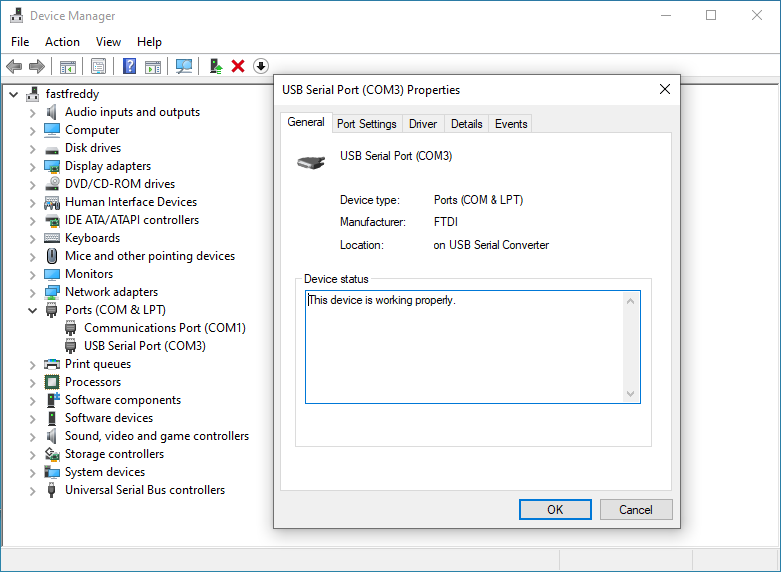
Device Manager After Installing Serial Cable Driver
Once this process completes, open the VM settings dialog and switch to the USB panel. It should look something like this:
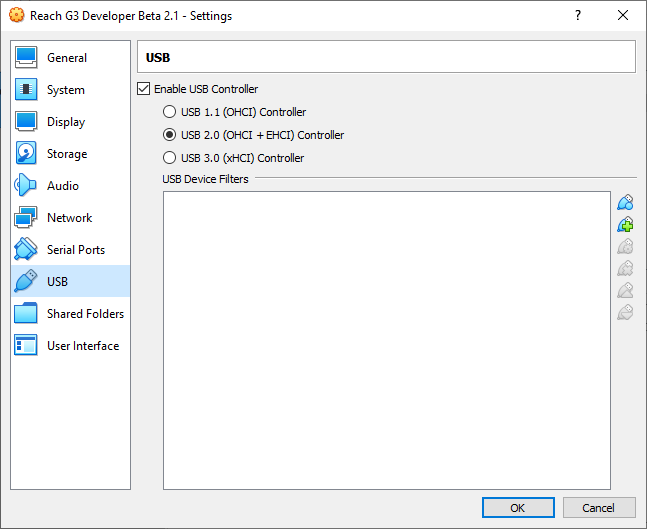
VM USB Settings Panel Before Adding Serial Cable Filter
Click the blue USB connector button with the green “+” on it to list the available USB devices as shown below:
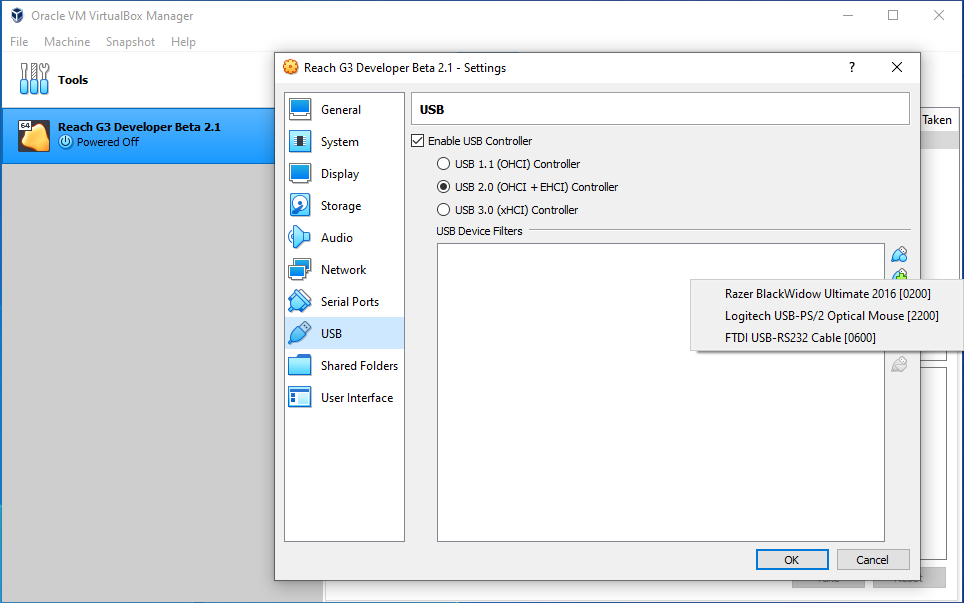
VM USB Settings Panel USB Device Selection
Click the “FTDI USB-RS232 Cable [0600]” entry to add the filter for the debug interface cable. The VM USB settings panel should now look like this:
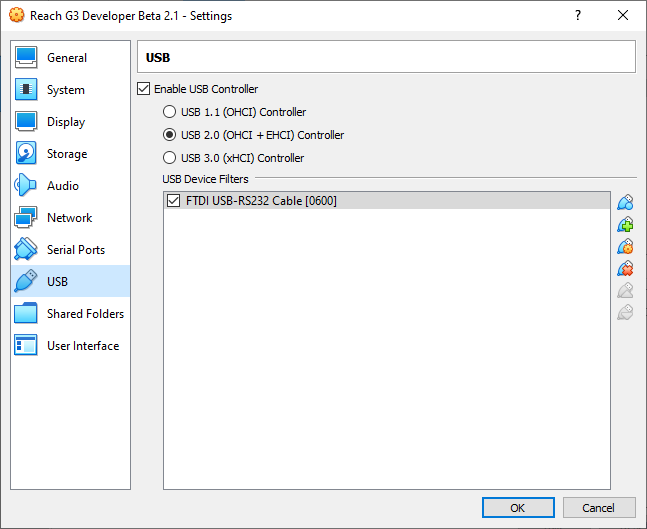
VM USB Settings Panel After Adding Serial Cable Filter
Tip
Remove all USB to serial converters and insert only the debug cable to make adding the filter easy… you will not be able to see the converter serial number until the filter is added.
With the filter entry selected in the list, you can click the blue USB connector button with the orange gear on it to popup the device details dialog as shown below:
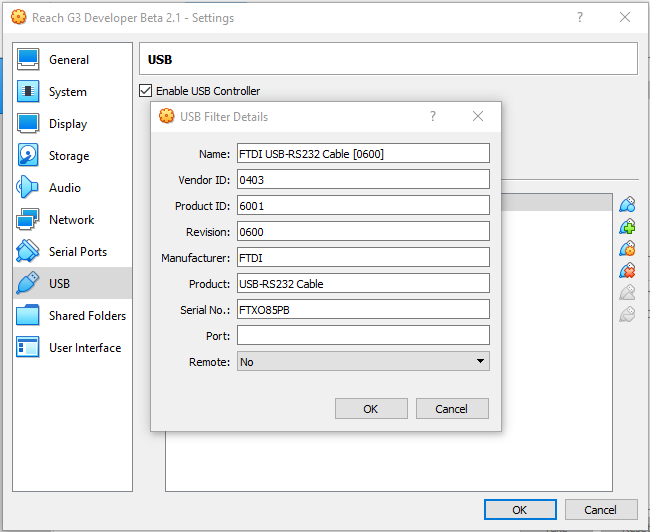
VM USB Settings Panel Serial Cable Filter Details
Tip
The main USB settings panel does not display the device serial numbers. Those are only shown on the details dialog. So if you have several similar USB devices; e.g. multiple USB to serial converters, the entries in the filter list will all look the same. Thus you can’t tell which is which on quick inspection.
When first adding the filter, change the name of the filter on the details dialog so you can easily tell which is which on the main USB filter panel.
Ethernet Configuration
Todo
(Todd) Network - bridge, 2nd adapter (IT Polizei), NAT Adapt 1 if using 2, fixed IP on bridged
Settings You May Want To Change
Todo
(Todd) write these…
System->Mobo - Memory
System->Processor - # of cores
Display->Screen - vid mem, mon cnt
Display->Remote - enable (security warning)
Serial Ports - real com ports only, not USB
USB - add filters for USB to Serial dongles
Settings You Should Not Change
Linux Mint 20 XFCE (Guest O/S) Configuration
A few items need to be completed before the VM guest O/S is fully configured:
Todo
(Todd) write these
Add the G3 module IP address to
/etc/hostsAdjust network IP address(es) in
/etc/exportsComplete Qt Creator configuration