Initial Module Power On
Assuming you completed the initial assembly and Terminal Emulator application installation successfully, you’re now ready to fire up the G3 module.
Ensure you have a Terminal Emulator open with the Debug Interface session open.
Plug the AC mains cord into the wall.
Connect the barrel connector plug on the AC adapter to the barrel connector socket on the “Y” cable.
You should see boot information and progress messages in the Terminal Emulator window.
A few seconds into the boot, a splash screen similar to the figure below should be displayed on the LCD panel.
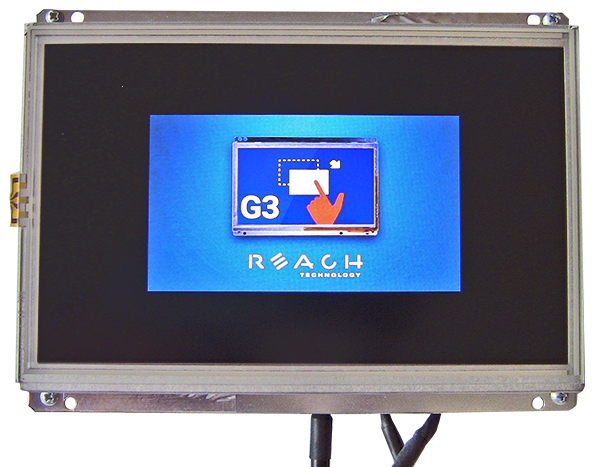
The Default Splash Screen
A few seconds after the splash screen is shown, you should see a login prompt in the Debug Interface Terminal Emulator session.
Finally, you should see our patient monitor UI concept on the LCD screen.
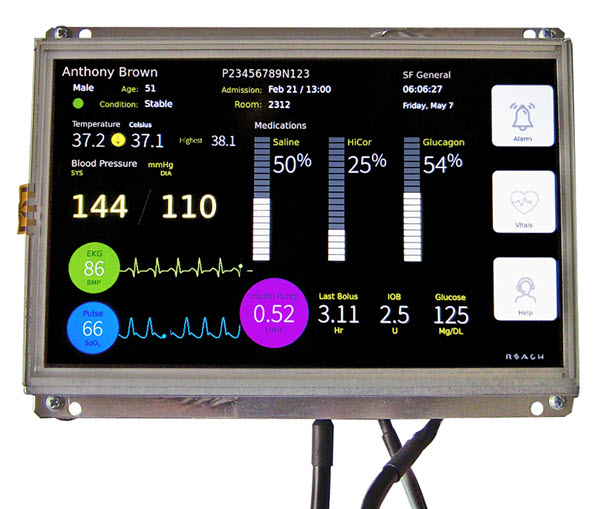
The “Medical” Demo
The “Medical” Demo1
Tip
For this section, you will definitely want to have a second Terminal Emulator session opened on the RS-232 port.
Several controls and informational sections are visible on the display; they are laid out for easy viewing and interaction. As shown below, the screen has several “hot spots” you can interact with and watch:
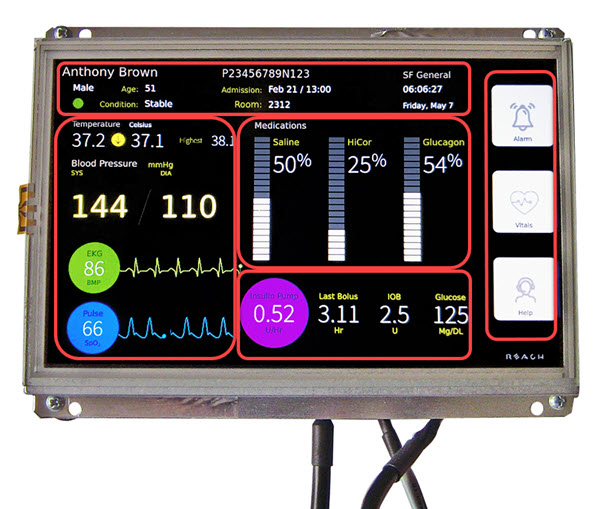
“Medical” Demo Hot Spots
The red boxes highlight several functional areas that include patient information, vital signs, medication controls, control data, and, on the far right, a few user buttons.
In addition to showing off some spiffy Qt widgets on the screen, the “Medical” demo provides a nice example of how applications can interact with your system hardware through the RS-232 port. The medication sliders are active and, upon release, send resulting values to the RS-232 port. The button states are also sent to the RS-232 port upon state change.
The demo includes three operable sliders on the display. They are:
Saline
HiCor
Glucagon
Move your finger up and down on each of the sliders and observe the value changes on the slider itself. When you release the slider, the resulting value is sent to the RS-232 port. In this case, “Saline.value=79” was the result.
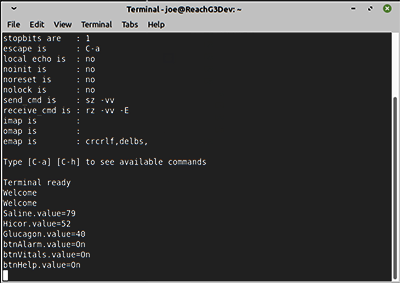
RS-232 Port Output for Slider and Button Changes
The demo includes three operable buttons along the right-most edge of the screen. They are:
Alarm
Vitals
Help
Press each button. You will notice that, as the state of the button changes, so does the color. The “Medical” demo uses the following colors to indicate button (and likely application) state:
Activated
Red (Alarm)
Yellow (Vitals and Help)
Deactivated
Grey
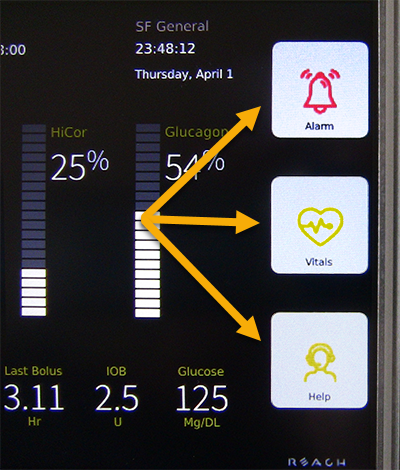
Buttons Activated
The buttons send data to the RS-232 port when pressed. In the Terminal Emulator screenshot above we see several button state change messages including “btnAlarm.value=On”, “btnVitals.value=On” and “btnHelp.value=On”.
Try them out.
The text boxes react to command strings sent over the RS-232 port.2 To change the Patient Name, type patientName=Joe and press <ENTER> in the Terminal Emulator RS-232 port session.3
Footnotes:
- 1
No lab mice were injured while we were pondering this concept demo.
- 2
The “Medical” demo does not echo characters received on the RS-232 port and the tty driver is not setup to enable echo by default so you won’t see the characters you type in the Terminal Emulator RS-232 port session unless you enable “local echo” in the Terminal Emulator port setup.
- 3
There is limited testing for value ranges. This is a concept demo not production ready code.